

Canva Brush: Turn a Presentation Slide into a Social Post
To turn a presentation slide into a social post with Canva Brush, decide what the post needs to communicate before changing its shape. Keep one main message, choose the information that must survive, and ask for a layout suited to the destination. Then review the actual output on a phone.
Canva's Brush announcement names adapting a presentation slide into an Instagram graphic as one use case. For CanvaBrush readers, this guide explains how to brief that change using a fictional studio event. The prompts and checks are editorial suggestions, not a recorded Brush test.
Choose the message that works without a presenter
A slide can rely on a speaker to explain a chart, finish a thought, or point out the important number. A social graphic has to make its purpose clear by itself. Moving every element into a taller frame can leave the audience with a dense page and no obvious next step.
Imagine a landscape slide promoting a studio open day. It contains a headline, a photograph of ceramic work, three paragraphs about the studio, and booking information. For a single social post, decide whether the goal is to introduce the studio or encourage a visit. In this example, the goal is a visit.
Before editing, prepare this short content plan:
| Slide content | Plan for the social graphic | Review question |
|---|---|---|
| Event headline | Keep as the main message | Can someone understand the event at a glance? |
| Ceramic-work photograph | Keep one clear focal image | Does the new crop preserve the object? |
| Long studio description | Move supporting detail to the accompanying caption | Can the graphic stand alone without those paragraphs? |
| Confirmed date and booking instruction | Keep accurate and readable | Does the wording still match the approved brief? |
This is a suggested editorial plan, not an automatic caption-transfer feature. Prepare and place the accompanying caption separately in your publishing workflow.
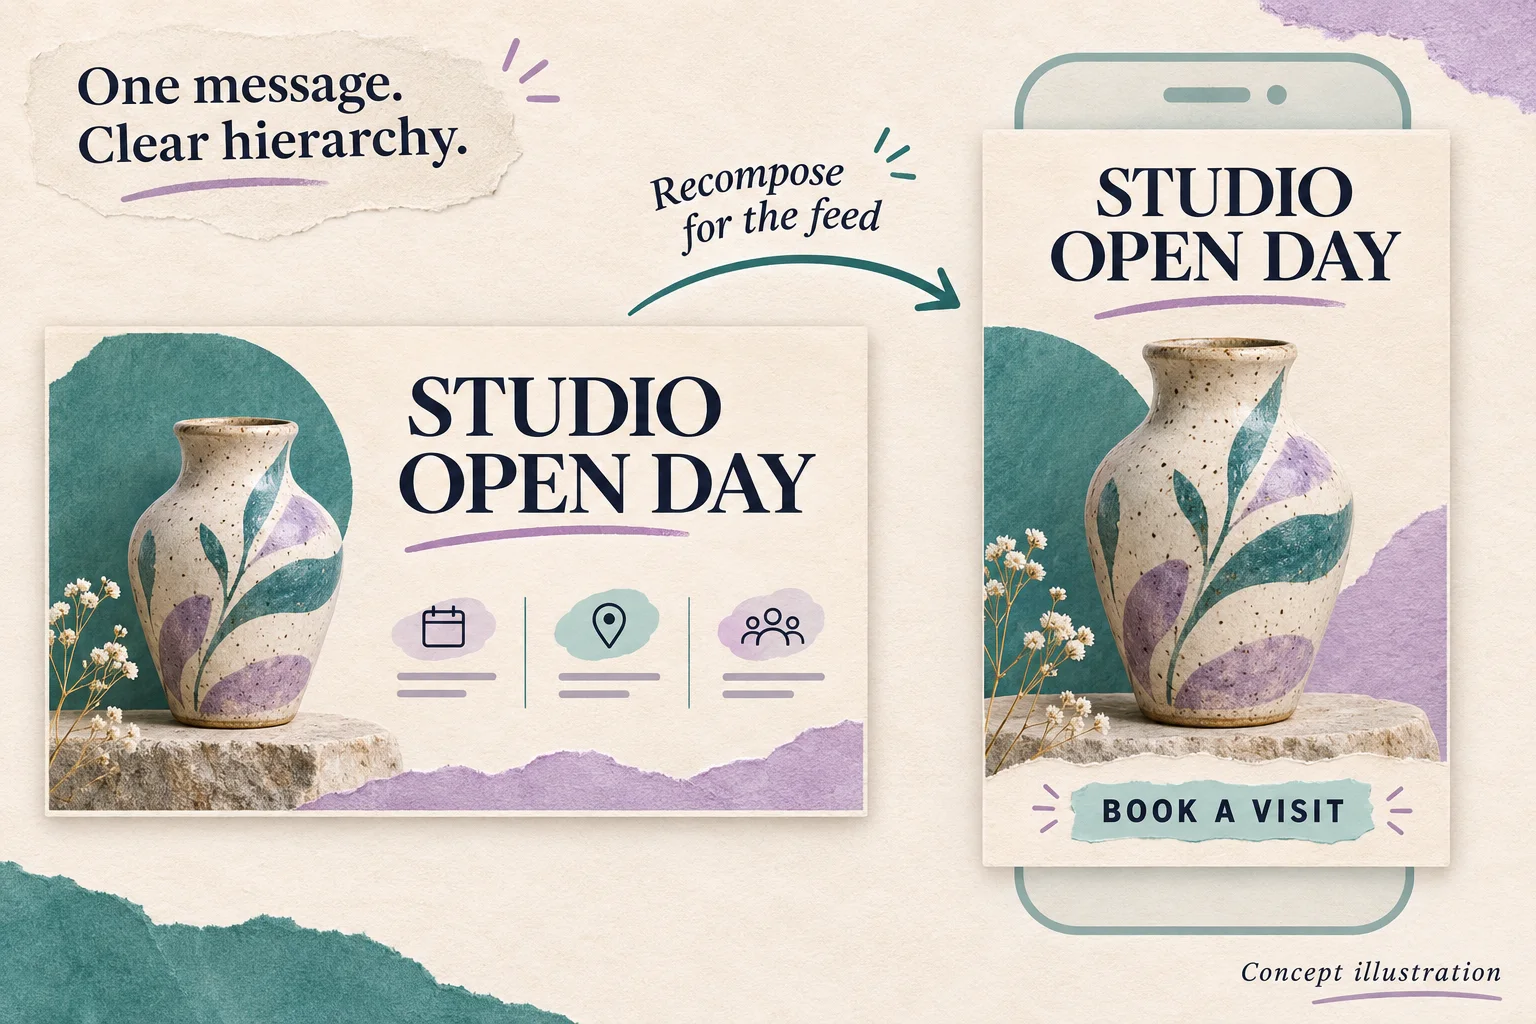
Original AI-generated concept illustration of a layout plan. It is not a Canva screenshot or an actual Brush before-and-after result.
Describe the destination and the content to retain
Canva's launch instructions say to open, attach, or link a design in Canva AI and select Brush. Supported edits launched for Canva Pro subscribers; confirm the options available in your account. If you need the model's background, read our Canva Brush introduction.
Keep the original presentation as a reference and work on a copy for the new deliverable. Identify the source page so that adapting one slide does not become an ambiguous request about the whole deck.
Try an instruction like this, replacing the example copy with approved information:
Adapt page 3 of this presentation into a portrait social graphic for the studio open day. Use “STUDIO OPEN DAY” as the main headline and “BOOK A VISIT” as the short action line. Keep the existing ceramic-work photograph and the confirmed event date from the source page. Remove the three descriptive paragraphs from this version; I will provide that detail in the accompanying caption. Recompose the elements with clear margins and enough space for the headline, image, date, and action line to read separately.
If your publishing brief specifies dimensions, include those dimensions and confirm the resulting design size in the editor. “For Instagram” describes the destination, but it does not tell a collaborator whether you mean a feed graphic, story, or another placement. Choose the intended placement before approving the design.
Recompose the hierarchy instead of squeezing the slide
The most useful change may be the relationship between the elements. A photograph that occupied half a landscape slide may need a different crop or position in a portrait layout. A heading that fitted on one line may need an intentional break.
Review the image and copy together. The object should remain recognizable, while the date and action line should have enough contrast to be read. If a caption printed inside the original photo is essential, check whether the new crop removes it. If text was embedded in the image, do not assume it has become a separate editable text element.
For a crowded result, narrow the next request:
Keep the current photograph and approved wording. Separate the event date from the action line, and give both more space below the image. Avoid placing text over the ceramic object.
This expresses the desired arrangement without asking for another full redesign. It still requires a comparison with the source; preservation instructions do not guarantee that every other detail stays identical.
Check the result at phone size
Start with facts. Compare the headline, date, names, and action wording against the approved content plan. Then view the graphic at a size close to how your audience will encounter it, rather than only zoomed in on a desktop.
Check three things:
- Message: the event and the next step are understandable without the original presentation.
- Image: the crop retains the subject, and text does not cover a necessary detail.
- Reading order: the headline, date, and action line are distinct, with no collision or confusing wrap.
If a small detail remains difficult to read, decide whether it belongs in the graphic at all. Moving a long explanation into the caption is a content decision. Verify that the caption has actually been prepared and that readers still have enough information to understand the post.
Finish the version you will share
Canva describes Brush designs as editable, so you can make a final manual correction in the editor. If only one line needs a small spacing adjustment, you do not have to regenerate the entire composition. Inspect the exported file as well as the editor preview before sharing it.
When one campaign needs changes across several pages, use a separate scope plan; our multi-page heading guide explains how to define exceptions and review each page. That is a different task from reducing one slide to a single social message.
Canvabrush.com's image tools and credits are separate from Canva account access. Perform the Brush design-editing step in Canva AI, and confirm your account's current controls. Begin with one source page and one destination, approve that version, and then adapt the brief for the next placement.
Written by CanvaBrush Editorial. Canva's Brush announcement checked November 2, 2026. The event and prompts are original examples; this guide makes no claim of account-level testing, guaranteed preservation, or measured performance.